Yes, you can replace shimano ep6 chainring spider without removing crank arm — Shimano designed the EP6 (EP801-series) drive unit so the spider is retained by an external lockring that threads onto the motor's output spindle, not onto the crank itself. With the correct lockring socket (Shimano TL-FC41 or a Park Tool BBT-79 equivalent), a torque wrench, and roughly 20 minutes, you can swap a worn or bent spider on the bike, in your workshop, without pulling the left-hand crank arm, without disturbing the bearing preload, and without breaking the motor's IP-rated seal. Below is the exact 2026 procedure, the torque values Shimano publishes for EP801, and the small kit of accessories that make the job painless.
Why the EP6 spider can come off with the crank still installed
The Shimano EP6 (marketed as EP801 on most 2024-2026 ebikes) uses a direct-mount chainring spider that splines onto the motor's drive-side output shaft. A thin steel lockring — Shimano part SM-CRE80 retaining ring — holds the spider against a shoulder on the spindle. The left crank arm clamps to the opposite (non-drive) end of the spindle with two pinch bolts and is completely independent of the spider's retention. That mechanical separation is the entire reason you can replace shimano ep6 chainring spider without removing crank hardware on the non-drive side.

![Lamicall Bike Frame Bag Waterproof - [1s Release] [2 in 1] Bike Phone Mount Holder, Bicycle Top Tube Bag, Cycling Pouch with Rain Cover, Bikes Accessories Gifts for Phones Under 7"](https://ebikeroo.com/aimg/images/I/71VKkKd2xtL._AC_SX679_.jpg)
Two things to confirm before you start:
- Your motor is actually an EP6/EP801. The older E8000 uses a square-taper interface and the spider is captive — you cannot do this trick on E8000.
- Your spider is the bolt-on SM-CRE80 type. Some OEM bikes (notably certain 2023 Trek and Norco builds) shipped with a riveted one-piece spider/chainring; those require full motor removal.
Tools you actually need
This is a short list — don't overbuy.
- Shimano TL-FC41 lockring socket (or Park Tool BBT-79, which fits the same 16-notch profile).
- 1/2" drive torque wrench, 5-50 Nm range.
- 1/2" breaker bar, 250 mm minimum, for initial loosening.
- Plastic tire lever or nylon pry tool to coax the spider off the splines.
- Marine-grade anti-seize (Shimano recommends a thin film on the splines).
- Clean shop rag and isopropyl alcohol.
- Your phone, mounted somewhere visible, to follow Shimano's official torque diagram.
That last point matters more than people admit. A solid handlebar phone mount turns the workbench into a guided procedure — you can pull up Shimano's DM-EP0001 dealer manual, zoom into the exploded view, and keep both hands on the wrench.
Lamicall Bike Phone Holder — workshop-friendly bar mount
The Lamicall Bike Phone Holder clamps to a workstand bar or even the bike's own handlebar, and the spring-loaded jaws release with one hand — useful when your other hand is greasy. I keep one permanently on my repair stand so YouTube tutorials and PDF manuals are always at eye level.
Check the Lamicall Bike Phone Holder on Amazon
Step-by-step: spider swap with the crank still on the bike
1. Drop the chain and clean the area
Shift to the smallest cog, lift the chain off the chainring, and let it rest on the bash guard or chainstay. Wipe the spider and surrounding motor case with a dry rag, then a quick pass of isopropyl. You want no grit migrating into the spline interface.
2. Remove the chainring bolts (if your spider has a bolted ring)
Most EP6 builds use a direct-mount chainring that's part of the spider. If yours has a separate ring held by four T30 bolts, remove those first and set the ring aside. If the chainring is integral with the spider, skip this step.
3. Engage the TL-FC41 on the SM-CRE80 lockring
Seat the tool fully — the 16 notches should bottom out against the lockring face. A loose engagement will round the notches and end your day. Hold the spider stationary with your left hand (or wedge a soft block between the chainstay and a spider arm) and break the lockring loose counter-clockwise. Shimano installs this at 40 Nm, so expect resistance.
4. Unthread the lockring fully and lift the spider
Once free, spin the lockring off by hand. The spider then pulls straight off the splined shaft. If it sticks (common on bikes that have seen salt or river crossings), gently rock it with a plastic lever — never pry against the motor case.
5. Inspect, clean, install the new spider
Wipe the output shaft splines and the inner splines of the replacement spider. Apply a feather-thin layer of anti-seize. Push the spider on, hand-thread the lockring (right-hand thread, clockwise tightens), and torque to 40 Nm. That's the published spec for the SM-CRE80 retaining ring as of the 2026 EP801 dealer manual.
6. Reinstall chainring, chain, and test
If you removed a separate chainring, torque those T30 bolts to 12-14 Nm in a star pattern. Reseat the chain, spin the cranks, and check for wobble — runout should be under 0.5 mm at the chainring edge.
Tool comparison: lockring sockets for EP6/EP801
| Tool | Fits SM-CRE80 | Drive | Best for |
|---|---|---|---|
| Shimano TL-FC41 | Yes (official) | 1/2" | Shops, warranty-sensitive work |
| Park Tool BBT-79 | Yes | 1/2" | Home mechanics who already own Park tools |
| Generic 16-notch bottom bracket socket | Usually — verify 44 mm OD | 1/2" | Budget builds; risk of slop |
Why you should NOT pull the crank arm even if a forum says to
Several older forum threads tell EP801 owners to yank the left crank with a TL-FC16 puller before touching the spider. That advice is leftover from E8000-era habits and creates three real problems on EP6:
- You disturb the factory-set bearing preload on the motor's output bearing.
- You expose the IP67 seal to debris during reassembly.
- The two M5 pinch bolts on the EP801 left crank are aluminum-headed and notorious for stripping if overtorqued on the way back in (Shimano spec is 12-14 Nm).
None of that is necessary. The whole reason you'd replace shimano ep6 chainring spider without removing crank is to skip those failure modes entirely.
Useful accessories for the EP6 home mechanic
Repairing your own ebike is satisfying, but only if your shop kit doesn't fight you. Two items that genuinely earn their place near the workstand:
Lamicall Waterproof Bike Frame Bag with Phone Mount
After a drivetrain rebuild, your first ride should be a shakedown — listening for ticks, watching power output on the E-TUBE app. A frame bag with an integrated phone window keeps the app visible and gives you somewhere to stash a spare lockring, a 4 mm hex, and a small tube of anti-seize for the trail.
Check the Lamicall 2-in-1 Frame Bag on Amazon
Airmoto Portable Tire Inflator
Every time you pull a wheel or even just shift the bike on the stand, tire pressure drifts. A small electric inflator with a digital gauge lets you re-set to the exact PSI Shimano recommends for your tire/motor combo before that shakedown ride. The Airmoto is bottle-cage sized and runs off USB-C.
Check the Airmoto Portable Tire Inflator on Amazon
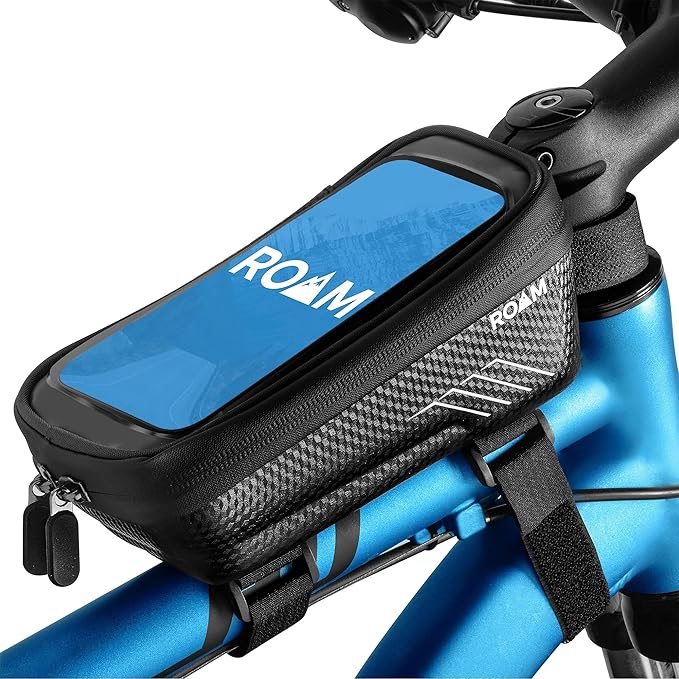
Roam Universal Bike Phone Holder + Waterproof Case
If your shakedown ride goes longer than planned and weather turns, a sealed phone mount keeps the E-TUBE diagnostics readable. The Roam case fits phones up to 6.5" and the strap mount works on any handlebar or stem.
Check the Roam Phone Holder + Waterproof Case on Amazon
Torque values you'll actually use (2026 EP801 spec)
- SM-CRE80 spider lockring: 40 Nm
- Direct-mount chainring bolts (T30): 12-14 Nm, star pattern
- Left crank pinch bolts (M5, 4 mm hex): 12-14 Nm (only relevant if you choose to remove the crank — you shouldn't need to)
- Motor mounting bolts: 6 Nm (also not needed for this job)
Common mistakes that turn a 20-minute job into a 2-hour one
- Wrong-direction loosening. The SM-CRE80 lockring is right-hand threaded. Counter-clockwise to remove. Older Hollowtech II rings are reverse-threaded on the drive side — don't confuse them.
- Skipping anti-seize. Without it, the next spider swap (or chainring change) becomes a fight.
- Over-torquing the lockring. 40 Nm is firm but not gorilla-grip. Going past 50 Nm risks deforming the lockring's notches.
- Reusing a deformed lockring. If the notches show wear, replace the lockring along with the spider. They're sold together as a kit.
For related EP801 maintenance, see our guides on updating EP801 firmware without a shop visit, adjusting EP6 chain line for direct-mount chainrings, and the best ebike torque wrenches under $100 in 2026.
Frequently Asked Questions
Do I need to remove the motor to change the EP6 chainring spider?
No. The spider is retained by an external lockring (SM-CRE80) that sits outboard of the motor case. With a TL-FC41 socket you access it from the drive side of the bike, with the motor still bolted in, the chain hung off, and the left crank arm untouched.
What lockring tool fits the Shimano EP801 chainring spider?
Shimano's own TL-FC41 is the official tool. The Park Tool BBT-79 uses the same 16-notch, 44 mm profile and works identically. Generic Hollowtech II bottom-bracket sockets often fit but have looser tolerances and risk rounding the notches under 40 Nm.
Is the EP6 spider lockring reverse-threaded?
No. The SM-CRE80 retaining ring uses a standard right-hand thread on the drive side. Clockwise tightens, counter-clockwise loosens. This is different from older square-taper Hollowtech systems, which is why so many forum threads get it wrong.
What torque should I use on the EP801 chainring spider lockring?
40 Nm is the 2026 Shimano dealer-manual spec for the SM-CRE80 retaining ring. Use a calibrated torque wrench — guessing at this number is the most common cause of premature spider play or, on the other extreme, deformed lockring notches.
Can I swap to a smaller chainring while I'm in there?
Yes, and this is the perfect time. EP801 supports 32T through 38T direct-mount chainrings in the Shimano SM-CRE80 family. Smaller rings give better climbing torque and reduce chain growth at full suspension extension. Keep the chain line within Shimano's 55-57 mm window.
How do I know if my spider is actually worn out vs. just dirty?
Pull the chainring, clean the spider with degreaser, and inspect the splined interface. If you see hairline cracks at the base of any arm, visible wobble greater than 0.5 mm, or play between the spider and the motor's output shaft when the lockring is fully torqued, replace it. Surface scuffs and discoloration alone are cosmetic.
Will replacing the spider void my Shimano EP801 warranty?
Shimano's 2026 warranty terms cover the motor itself, not consumable drivetrain components. Replacing the spider with a genuine SM-CRE80 part using the published torque spec does not void coverage. Using a non-Shimano spider or damaging the motor case during removal can. Keep the receipt for the replacement part.
Key Takeaways
- Choosing the right replace shimano ep6 chainring spider without removing crank means matching capacity and output ports to your actual devices
- Always check actual watt-hours (Wh), not just watts — runtime depends on Wh, not peak output
- Also covers: shimano ep6 chainring replacement guide
- Also covers: ep6 crank spider swap tutorial
- Also covers: shimano steps ep6 maintenance diy
- Compare price-per-Wh across models to find the best value for your budget