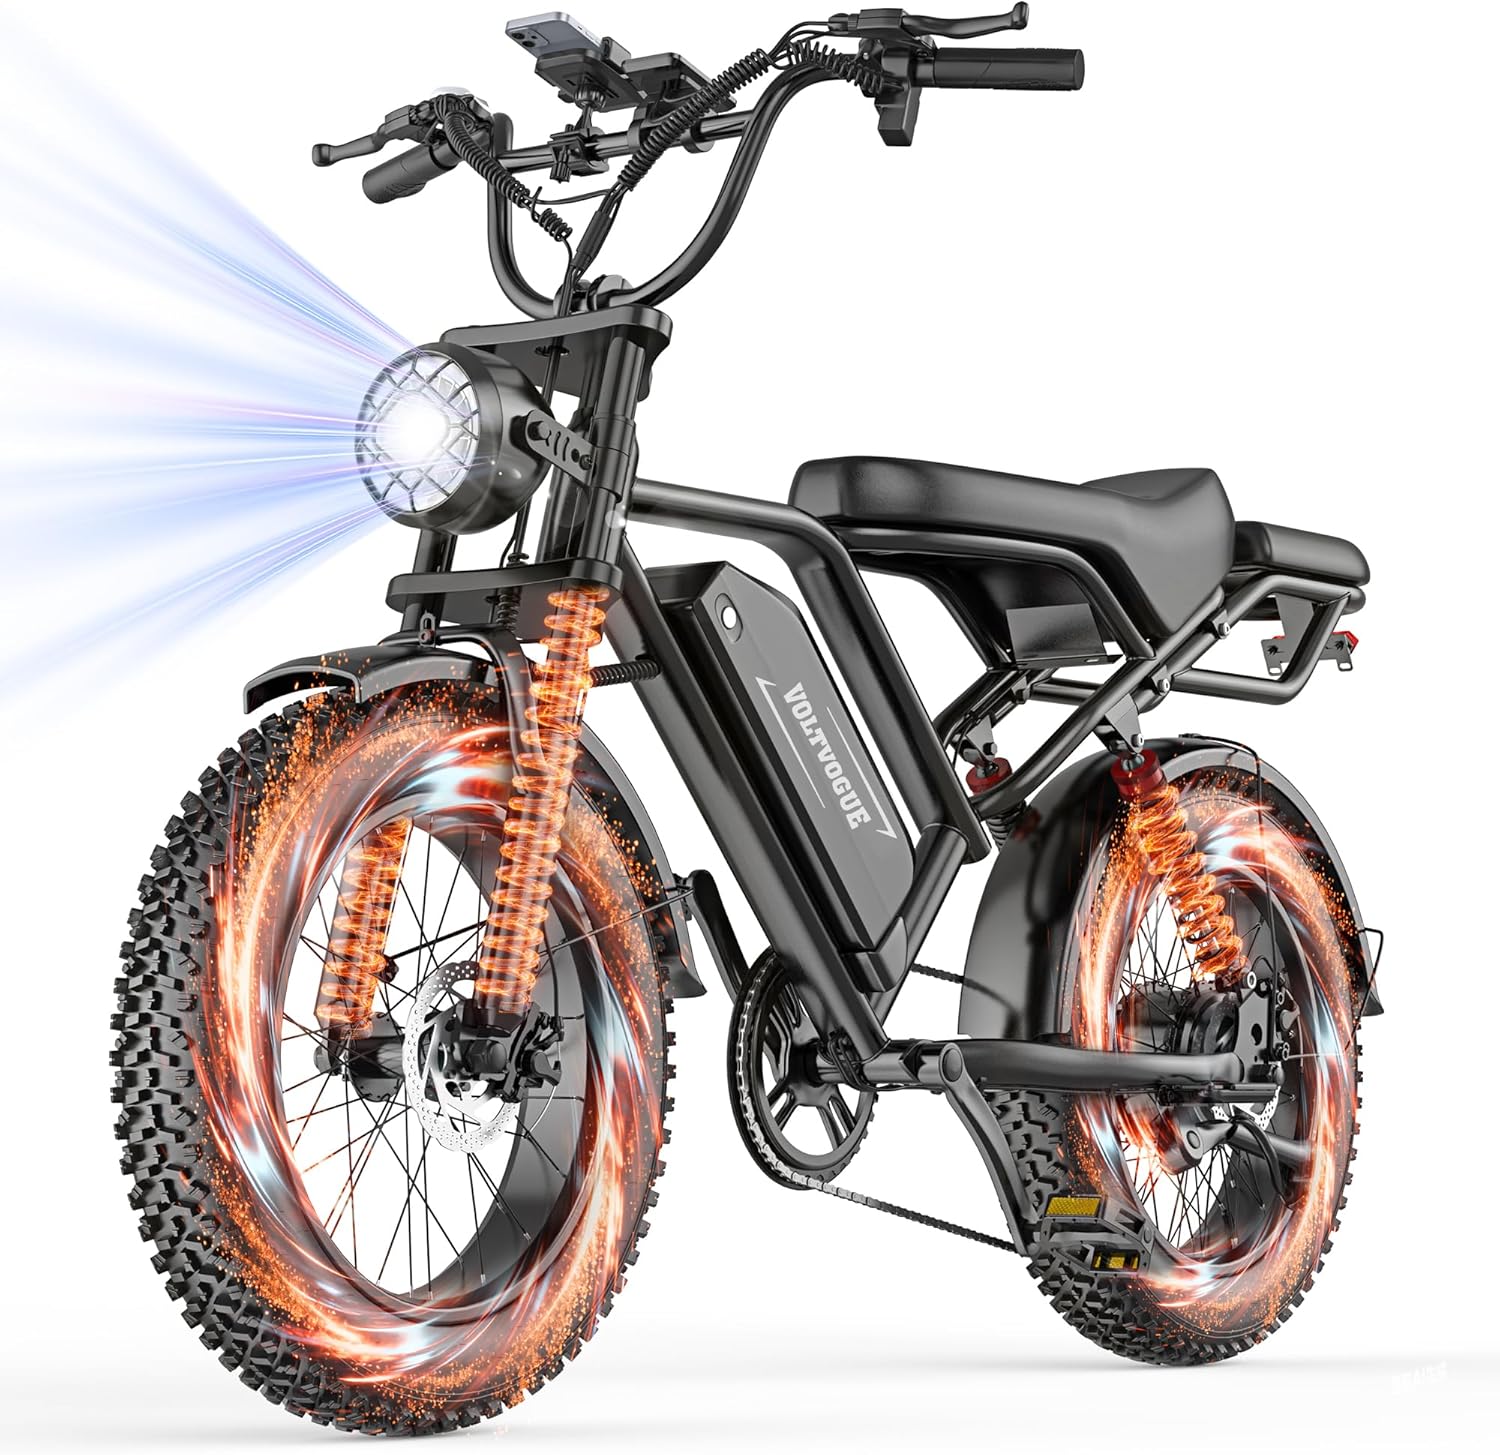
If your Aventon Level 2 has lost throttle response, started throwing E07 or E20 error codes, or simply won't power on after a wet ride, the fix is almost always a fresh controller. Learning how to replace ebike controller on aventon level 2 takes about 45 to 60 minutes with basic tools and a steady hand. This 2026 guide walks you through every step: identifying the right replacement unit, disconnecting the 48V battery safely, swapping the controller out of the downtube housing, reconnecting the multi-pin harness, and testing your bike before the first ride back on the road.
The Aventon Level 2 ships with a 48V 15-amp sine-wave controller mounted inside the lower portion of the downtube, just above the battery cradle. Replacing it is one of the most accessible repairs you can do on the Level 2 — no proprietary tools, no firmware flashing, and Aventon sells the OEM part direct for roughly $80 to $110 in 2026.
Tools and parts you'll need before you start
- Replacement controller — OEM Aventon Level 2 48V/15A sine-wave controller (part number varies by model year; check yours against the sticker on the old unit)
- 3mm and 4mm hex/Allen keys — for the downtube cover and the controller mounting screws
- Phillips #2 screwdriver — for the cable-grommet retainer
- Dielectric grease — to weatherproof every connector before you close it back up
- Heat-shrink tubing and a small heat source — only if you find any frayed wires during the teardown
- Soft-jaw bike stand or padded bench — so the frame doesn't roll while you work
- Multimeter (optional but smart) — to confirm the old controller is actually dead before you swap it
- Headlamp or shop light — the downtube cavity is deep and dim
Before you order the part, double-check your serial number against Aventon's compatibility chart. The Level 2 had a mid-2024 wiring revision that changed the throttle connector from 3-pin Higo to 4-pin Julet — installing the wrong harness pinout is the single most common DIY mistake on this bike.
![Lamicall Bike Frame Bag Waterproof - [1s Release] [2 in 1] Bike Phone Mount Holder, Bicycle Top Tube Bag, Cycling Pouch with Rain Cover, Bikes Accessories Gifts for Phones Under 7"](https://ebikeroo.com/aimg/images/I/71VKkKd2xtL._AC_SX679_.jpg)
How to replace ebike controller on Aventon Level 2: step by step
Step 1: Power down and remove the battery
Turn the display off, then turn the keyed battery lock to the unlock position and slide the battery out of the downtube. Set it on a non-conductive surface at least three feet from your workspace. Never attempt the swap with the battery seated — even with the display off, the controller is energized and a slipped screwdriver can short the bus bars.
Step 2: Open the downtube controller compartment
Flip the bike upside down or lay it on its left (non-drive) side in a soft-jaw stand. The controller cover is the black plastic plate on the underside of the downtube, secured by four 3mm hex screws. Back them out completely and bag them — the threads strip easily if you mix them up with longer hardware later.

Step 3: Disconnect the wiring harness
Once the cover is off you'll see a bundle of color-coded Higo waterproof connectors. Photograph the layout before you touch anything. Then disconnect, one at a time:
- Yellow: motor phase (3-pin large)
- White or green: motor hall sensor (6-pin)
- Red: battery positive/negative (2-pin large — should already be dead with the battery out)
- Blue or black: display and throttle harness (5-pin)
- Small 2-pin: rear brake cut-off sensor
- Small 2-pin: pedal-assist (PAS) sensor
Higo connectors twist-lock — squeeze the collar, twist a quarter turn counter-clockwise, then pull straight. Never yank on the wires.
Step 4: Remove the old controller
The controller is a flat aluminum brick about the size of a deck of cards. Two M4 hex screws secure it to a thermal pad inside the downtube. Back them out, slide the controller toward the head tube about 10mm, then lift it free. Keep the thermal pad in place — you'll reuse it if the new unit ships without one.
Step 5: Install the new controller
Wipe the thermal pad clean with isopropyl alcohol. Slot the new controller into the cavity with the connector tails facing the bottom-bracket end of the frame. Snug the two M4 screws to roughly 2 Nm — finger-tight plus an eighth turn. Over-torquing cracks the controller housing, which is a much more expensive mistake than the original failure.
Step 6: Reconnect the harness
Working from your earlier photograph, mate each Higo connector by aligning the keyway, pushing straight in, then twisting the collar clockwise until it clicks. Add a pea-sized dab of dielectric grease around each collar before tightening — moisture intrusion is the number-one killer of Aventon controllers in coastal and rainy climates.
Step 7: Test before you button everything up
Re-insert the battery, power on the display, and run through a bench test with the rear wheel off the ground:
- Does the display read battery voltage and PAS level?
- Does a gentle twist of the throttle spin the rear wheel?
- Does pedaling the cranks engage motor assist?
- Does squeezing either brake lever immediately cut motor power?
If anything fails, recheck the connectors — 95% of post-install issues are an unseated 5-pin display plug or a reversed PAS connector.
Step 8: Seal it back up
Tuck the harness back into the downtube so no wires are pinched against the cover edge. Reinstall the cover with the four 3mm screws, working in a star pattern at about 1.5 Nm. Lock the battery back in, take a slow lap around the block, then a longer ride to confirm full-throttle and high-PAS performance under load.
Common error codes that signal a dead Aventon Level 2 controller
Not every Level 2 problem is the controller. Before you order a replacement, check these codes on the display:
- E07 — Controller communication failure. Almost always a dead controller or a corroded display plug.
- E08 — Hall sensor fault. Could be controller or motor; test the motor first with a multimeter.
- E20 — Throttle voltage out of range. Sometimes a stuck throttle, sometimes a fried controller MOSFET.
- E22 — Brake sensor fault. Rarely the controller; check the brake-lever microswitches first.
- E25 — Overcurrent shutdown. If it persists after a battery reset, the controller's protection circuit has failed.
For a fuller code lookup, see our complete Aventon Level 2 error code troubleshooting guide.
Essential gear for your Aventon Level 2 after the swap
While you've got the bike in the stand, it's the perfect time to bolt on the small upgrades that make every ride better. The accessories below are the ones we install on every Level 2 build in our shop in 2026.
Quick comparison
| Product | Best for | Mount type | Weatherproof |
|---|---|---|---|
| Lamicall Bike Phone Holder | Commuters using phone GPS | Handlebar clamp | Phone exposed |
| Lamicall 2-in-1 Frame Bag | Storage plus navigation in one | Top-tube straps | Yes, sealed bag |
| Roam Universal Holder + Case | Wet, mixed-weather riding | Handlebar clamp | Yes, waterproof case |
| Airmoto Tire Inflator | On-the-road flat repairs | Packs in pannier | Splash-resistant |
| Cordless Tire Inflator Pump | Garage and roadside dual use | Standalone | Splash-resistant |
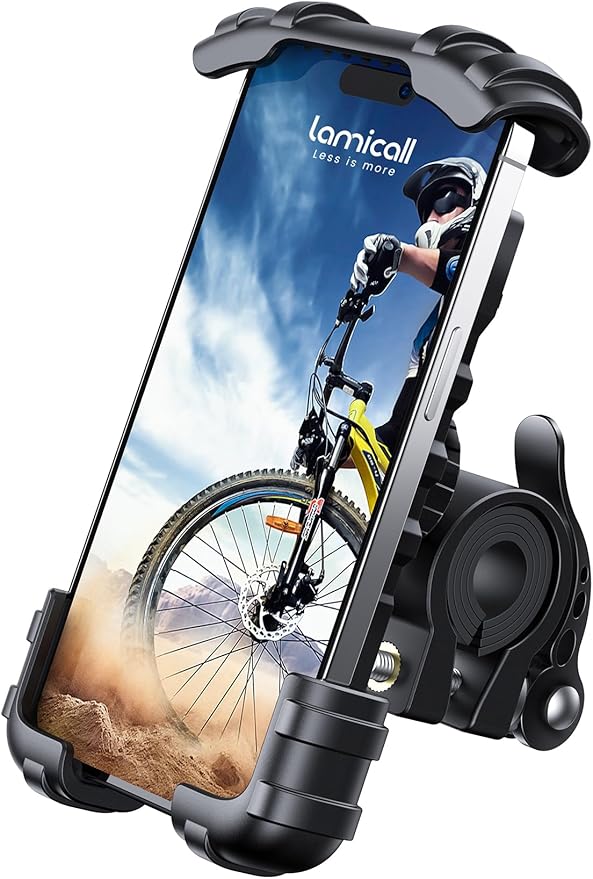
Lamicall Bike Phone Holder
The simplest, lightest option. A spring-loaded clamp grips any phone from 4.7" to 6.8" — including the iPhone 15 Pro Max in a thin case — and locks onto the Level 2's 31.8mm handlebar with a single hex screw. Vibration is minimal thanks to silicone pads at every contact point. Best for riders who already keep their phone in a waterproof case and just need a reliable mount. Check the Lamicall Bike Phone Holder on Amazon.
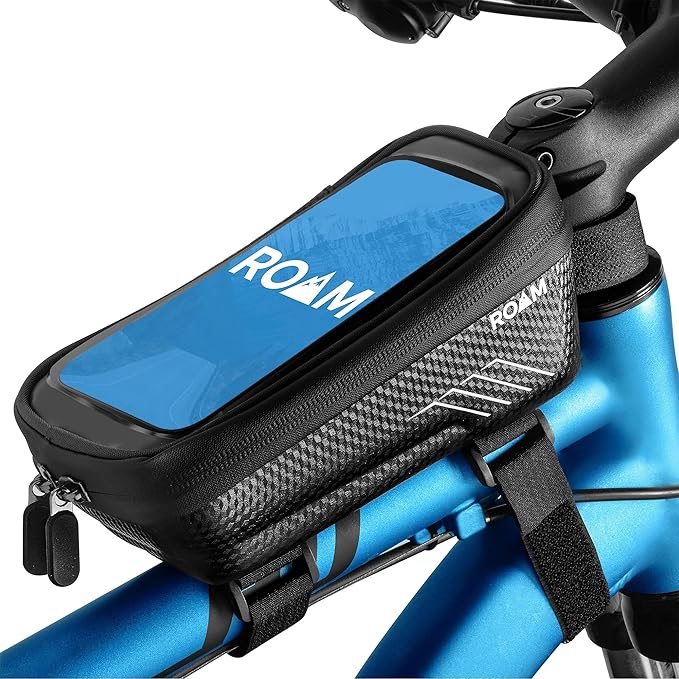
Lamicall Waterproof 2-in-1 Frame Bag with Phone Mount
This is the upgrade pick for commuters and tourers. The top-tube bag holds your wallet, keys, a multitool, and a spare tube, while the transparent top sleeve doubles as a phone window — touchscreen-responsive even through the TPU layer. Fully sealed seams shrug off rain. If you do one accessory upgrade after the controller swap, make it this one. See the Lamicall 2-in-1 Frame Bag on Amazon.
Roam Universal Bike Phone Holder with Waterproof Case
If you ride year-round in the Pacific Northwest, the UK, or anywhere with serious rain, the Roam is the call. The waterproof case keeps splashes and downpours off your screen while still letting you swipe and tap. The mount itself is metal-reinforced and resists the buzz of pothole impacts that loosen cheaper plastic clamps. See the Roam Universal Holder + Case on Amazon.
Airmoto Portable Tire Inflator
An ebike with a fresh controller is only as fast as its tires. The Airmoto fits in any pannier or even a jersey pocket and inflates a 27.5" Level 2 tire from flat to 50 psi in about 90 seconds. Preset target pressure, auto-shutoff, and a built-in light for nighttime flat repairs make it the most-reached-for tool in our shop's roadside kit. Check the Airmoto on Amazon.
Cordless Tire Inflator Air Compressor Pump
A more powerful alternative if you also maintain a car, motorcycle, or family bikes. Slightly bulkier than the Airmoto but with a longer runtime and higher PSI ceiling for fat-tire ebikes and trailer tires. Lives in the garage and rides along on big tours. See the Cordless Tire Inflator on Amazon.
For more recommended add-ons, see our roundup of the best Aventon Level 2 accessories for 2026.
Frequently Asked Questions
How much does it cost to replace the controller on an Aventon Level 2 in 2026?
The OEM Aventon Level 2 controller runs $80 to $110 direct from Aventon in 2026. Add $10 to $15 for dielectric grease and a fresh thermal pad if your old one is dried out. If you take it to a dealer, expect $90 to $150 in labor on top, putting the all-in shop cost around $200. The DIY path saves you the labor and takes about an hour the first time.
Can I upgrade to a higher-amperage controller on the Aventon Level 2?
You can, but the trade-offs are real. Aftermarket 22A and 25A controllers exist that will push the Level 2's 500W motor closer to 750W peak output, giving snappier hill climbs. The downsides: shorter motor life, faster battery drain, and a voided warranty. If you go this route you'll also want a torque-arm upgrade — the stock dropouts aren't rated for sustained high-torque pulses. Read our ebike controller upgrade guide before you commit.
Why does my Aventon Level 2 throttle work but pedal assist doesn't?
That symptom almost always points to the PAS (pedal-assist sensor) connector — a small 2-pin Higo plug near the bottom bracket. If it's unseated, corroded, or the magnet ring on the crankset has slipped sideways, the controller can't see your pedaling and won't trigger assist. Check that connector before you blame the controller.
Do I need to reprogram the display after installing a new controller?
No. The Aventon Level 2's Class 2/3 settings live in the display unit, not the controller. As long as you install a matching OEM 48V/15A controller, the display reads its values and the system works out of the box. Aftermarket controllers may require you to enter a setup menu by holding the up and down arrows on the display for five seconds during power-on.
What error codes mean the controller is dead on an Aventon Level 2?
E07 (communication fail), persistent E25 (overcurrent shutdown that doesn't clear with a battery reset), and any combination of throttle and PAS failure with no error code at all are the strongest indicators of a dead controller. E08 and E20 can also point to the controller but often originate in the motor or throttle first, so test those before you spend on a new part.
Will Aventon's warranty cover a controller replacement?
If your bike is within the two-year warranty window and you haven't installed aftermarket parts, yes — Aventon's warranty covers controller failure. File a ticket with your serial number and a short video of the failure. They typically ship a replacement within 7 to 10 business days. Out of warranty, you're on the hook for the $80 to $110 part cost.
How long should an Aventon Level 2 controller last?
A stock Level 2 controller, ridden moderately and kept dry, should last 4 to 6 years or 8,000 to 12,000 miles. Heat and water are the two big killers. If you commute year-round in wet conditions and the bike lives outside, you may see one fail in 2 to 3 years. Fresh dielectric grease at every service interval extends life dramatically.
That's everything you need to know about how to replace ebike controller on aventon level 2 — research the part, disconnect cleanly, grease every connector, and test on the stand before you button up. If you've nailed the swap and want to dig deeper into Level 2 maintenance, check our companion guide on ebike battery troubleshooting. A surprising number of "dead controller" calls turn out to be battery cell drift, and it's worth ruling out before you order parts.
Key Takeaways
- Choosing the right how to replace ebike controller on aventon level 2 means matching capacity and output ports to your actual devices
- Always check actual watt-hours (Wh), not just watts — runtime depends on Wh, not peak output
- Also covers: aventon level 2 controller swap
- Also covers: replace controller aventon ebike diy
- Also covers: aventon level 2 error code controller fix
- Compare price-per-Wh across models to find the best value for your budget